Eurovan Solar Panel
Back
Updated 2021-05-15 fixed typo and broken link for GSNI strut model number
Updated 2017-06-15 with more pictures and info about running the wire to the starting battery
Updated 2013-03-15 with more pictures
In which I describe the adding of an 85 watt solar panel and charge controller to a 2000 Eurovan Camper.
I had several goals in this project: a solar panel that was big enough to provide significant power (for the non-stock oversized house batteries) but not so big or heavy that it wouldn't fit on the roof, or would make raising the roof too difficult from added weight. Price was a concern. Solar panels tend to come in two varieties: 12 volts, and 24+ volts. The 12V panels are better for RV use since they don't require a MPPT charge controller. I don't plan on selling the van, so cutting holes & permanent modifications were O.K.
What I ended up with:
- SolarTech SPM085P 85 Watt Solar panel
Features: decent power, will fit sideways on the van's roof, reasonable price, and is a 12V panel. - MorningStar SunSaver Duo Solar Charge Controller
Features: can monitor and charge both the house and starting batteries, temperature compensated, reasonable priced, and has remote meter. This is a PWM controller, not a MPPT controller, but from what I've read this often makes little difference in 12V RV applications. - Mounting rails: a previous owner had already installed Yakima roof rails 54" tracks so I wanted something that would mount to these. The solution was to build custom mounts - I used 2" aluminum L-shaped stock from the local hardware store, 6mm metric stainless hex bolts, which mate nicely with the existing yakima Anchor Plates.
- Higher pressure roof struts: with the extra weight, I upgraded from stock 100lb struts to 130lb versions. GSNI-3100-130 Struts from Associated Spring Raymond
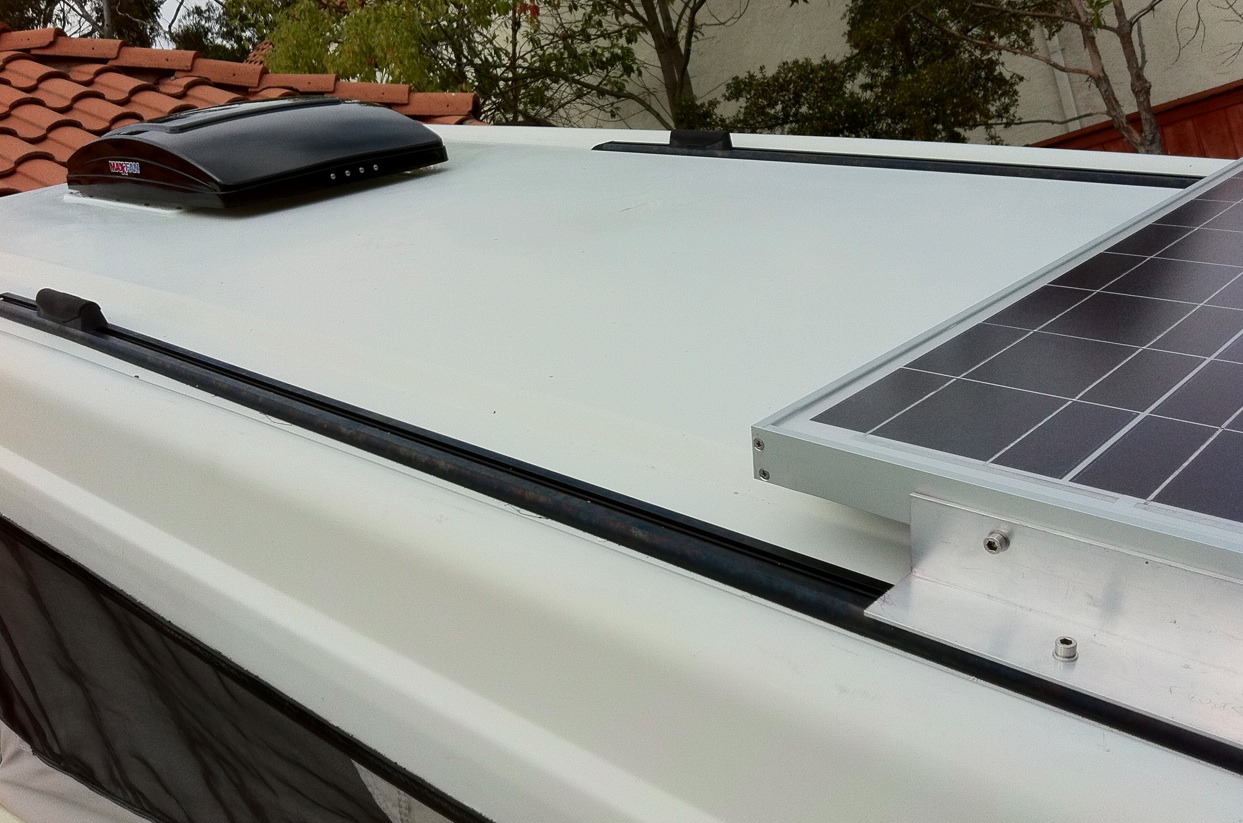
Solar Panel On Roof showing custom aluminum mount which connects to Yakima roof rack (in the background, visible is the MaxxFan, installation as per Eurovan MaxxFan)
Many solar panels are too big, heavy, or rectangular shaped to fit nicely on the roof. This is a SolarTech 85 which has a relatively square aspect ratio. I mounted it close to the hinge on the roof to reduce the amount of level-arm it adds for opening the roof.
Solar Panel On Roof (different angle)

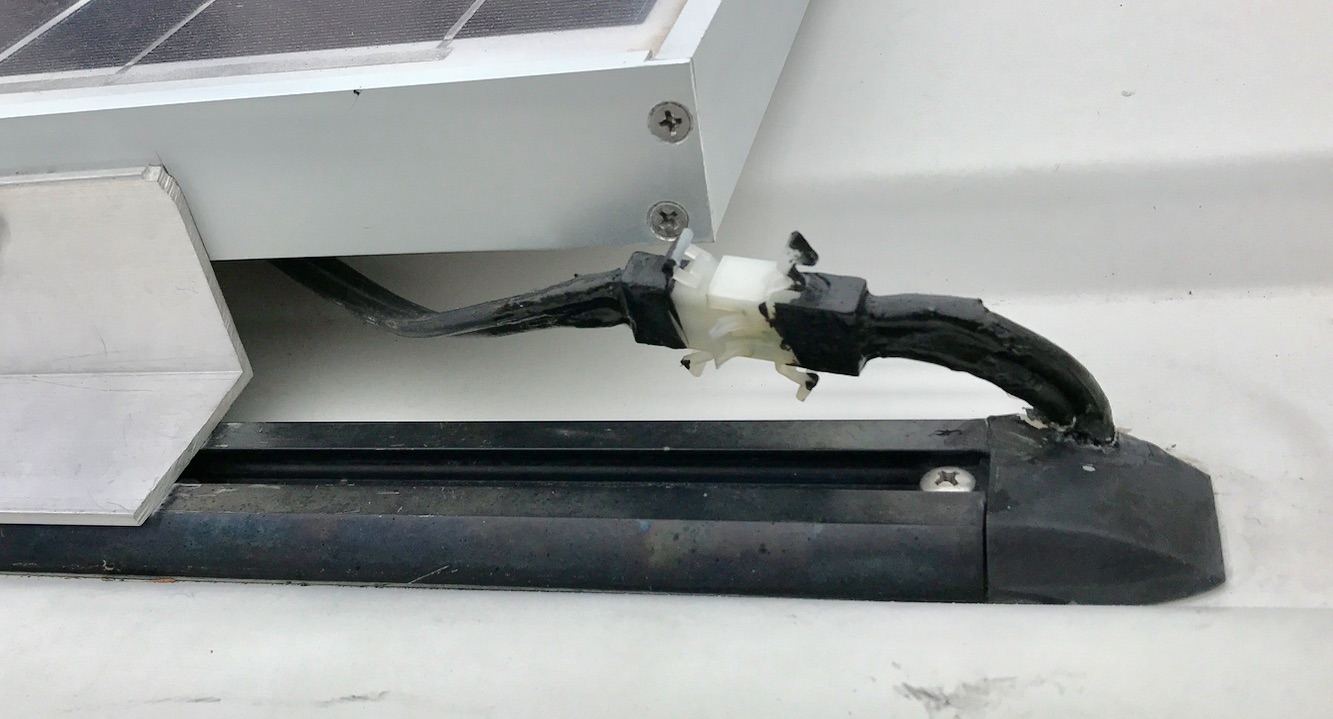
Detail showing roof penetration for wiring I drilled a hole underneath the plastic end cap of the yakima rack, so it was easy to seal, and could be hidden.
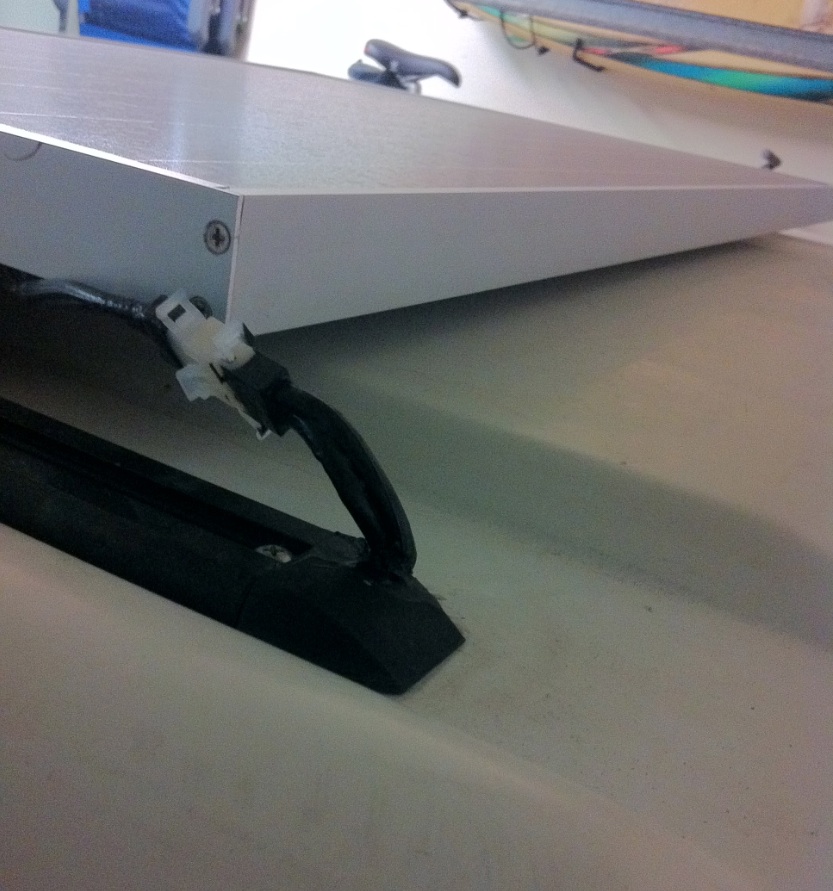
Wiring More Detail showing roof penetration for wiring.
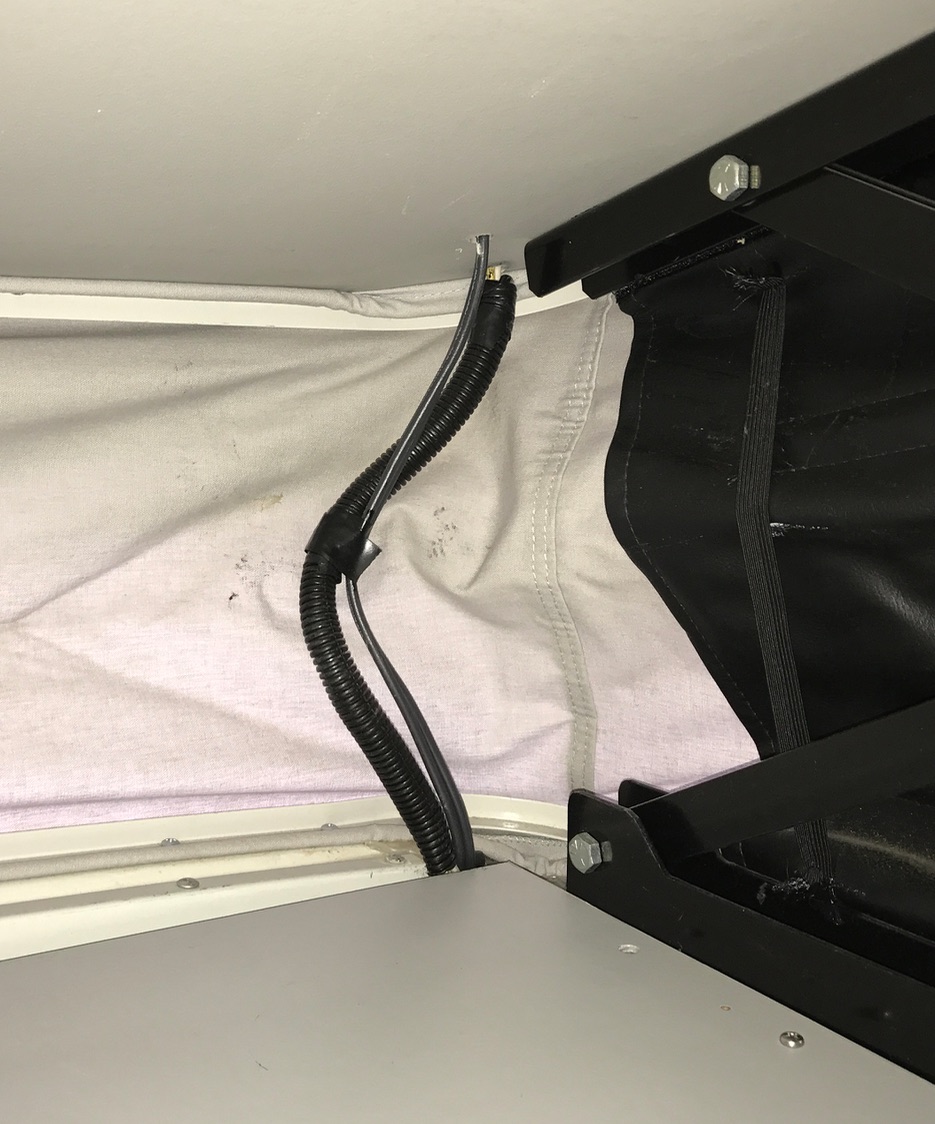
Wiring More Detail showing wiring going down through closet towards electrical panel.
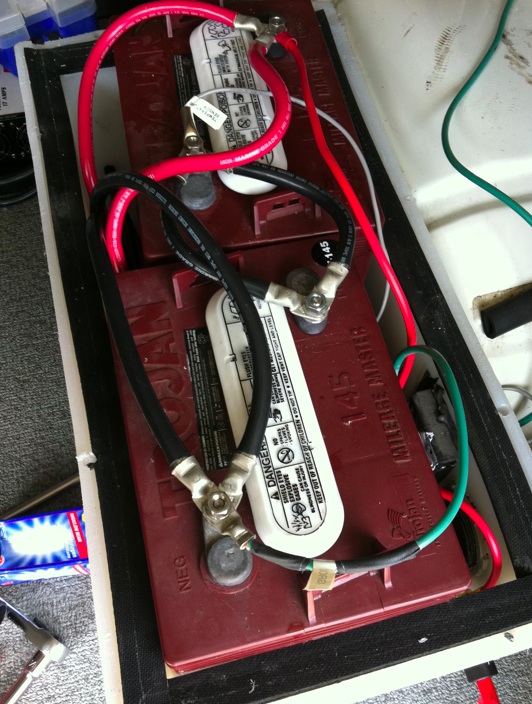
Moar Power: modified battery compartment with dual Trojan T145
This is a non-stock modification by the van's previous owner. These provide about 220-260 AH Amp*Hours according to the specifications, which is about double the energy available in the stock house battery.
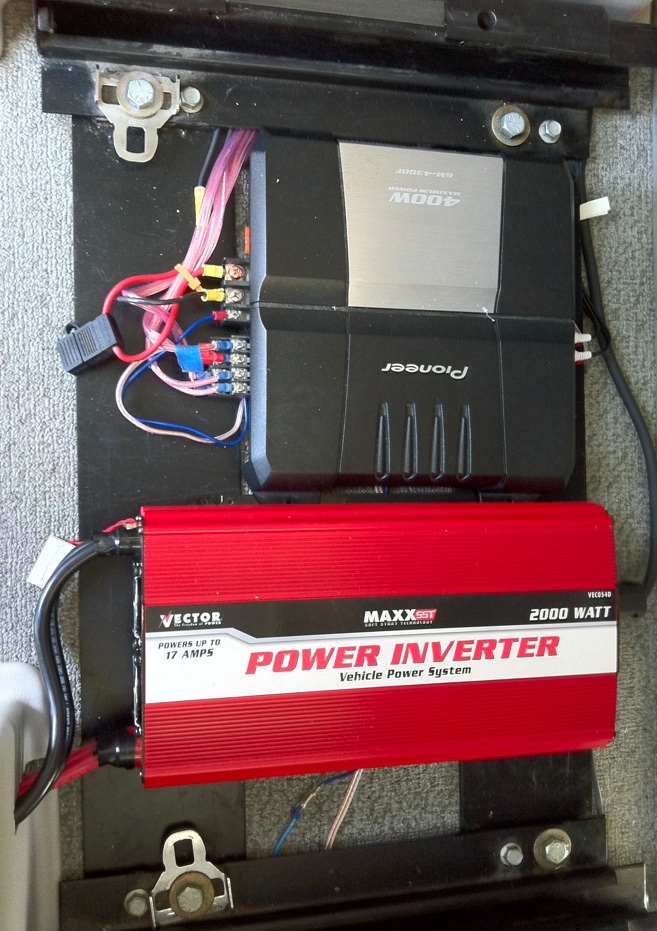
Even Moar Power: a Vector Maxx SST 054C "2000 watt" inverter mounted under the rear seat (also visible, audio amplifier) Vector 2000W Inverter User Manual. This is a silly-big inverter, and is really overkill for this application. I may replace this with a smaller true-sine-wave inverter in the future.
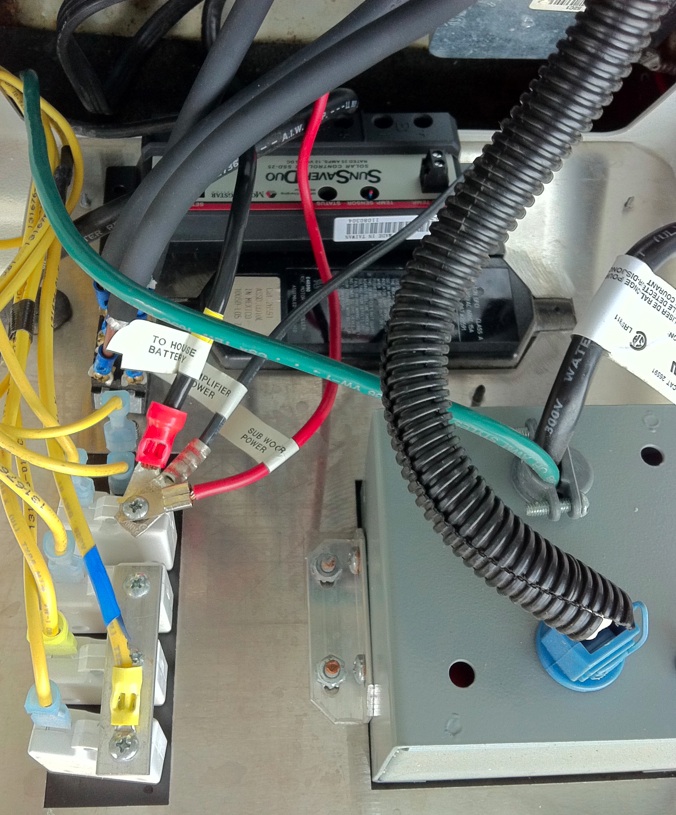
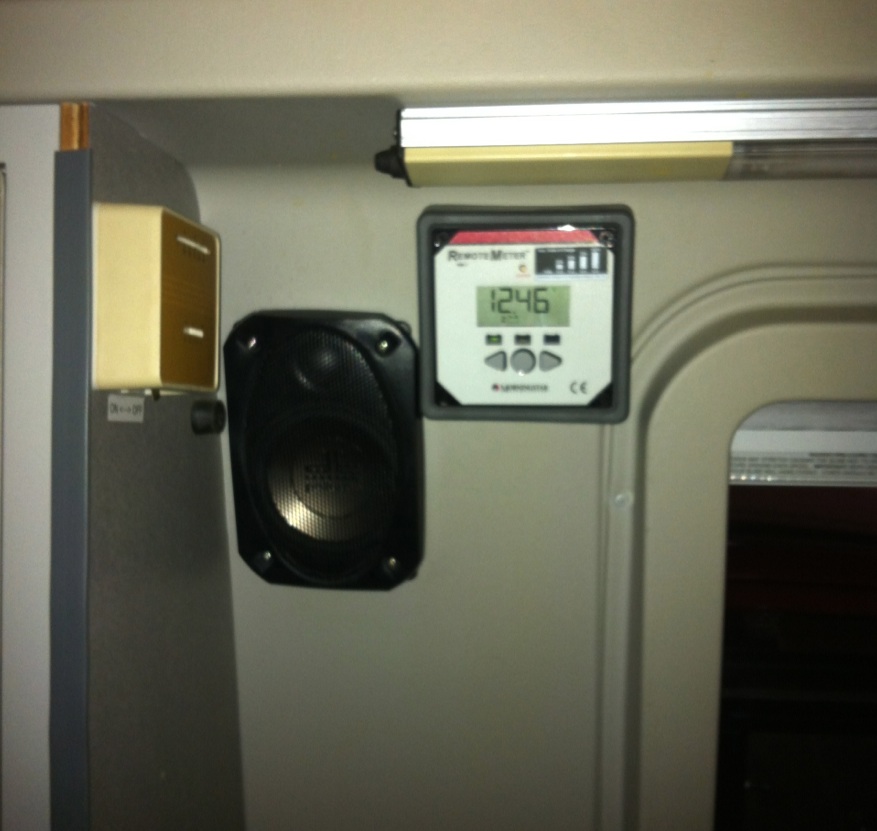
Charge Controller: morningstar SunSaver Duo - it fits snugly behind the existing camper van electrical panel, held on with velcro
The SunSaver Duo has one very nice feature: a 2nd battery connection so you can also monitor and charge the starter battery as well.
Routing Wire for Starting Battery: to monitor and charge the starting battery, you have to fish a new wire from the Charge Controller. Here's the route I took (no pictures, sorry): From front to back:
- Battery - you can probably attach to an existing post.
- The firewall has some rubber grommets that you can poke a hole in and fish a wire through (entering behind/above the fusebox)
- from there, peel back the carpet by the hood release handle - you'll see some other wire bundles you can follow
- they go under the driver's side plastic entry step
- up behind the plastic on the wall behind the driver's seat (below the shoulder belt attachment)
- along the left wall, behind the stove, fridge, cabinet and sink (multiple routes make sense here)
- once past the sink, come out and follow near the furnace vent and past the water tank (visible in some pictures here)
- you'll end up near the rear electrical panel.
This is a temporary mounting stuck on with hot glue, if I like the location I'll go ahead and cut a hole in the wall and do a flush mount...
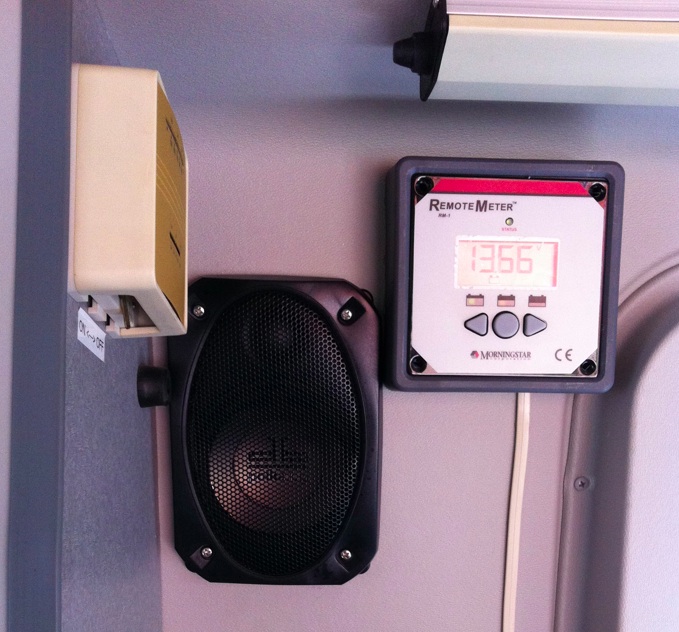
Remoter Monitor Final location: turns out it was too deep to mount flush, so I left it surface mounted but ran the wire behind the wall
Notes